
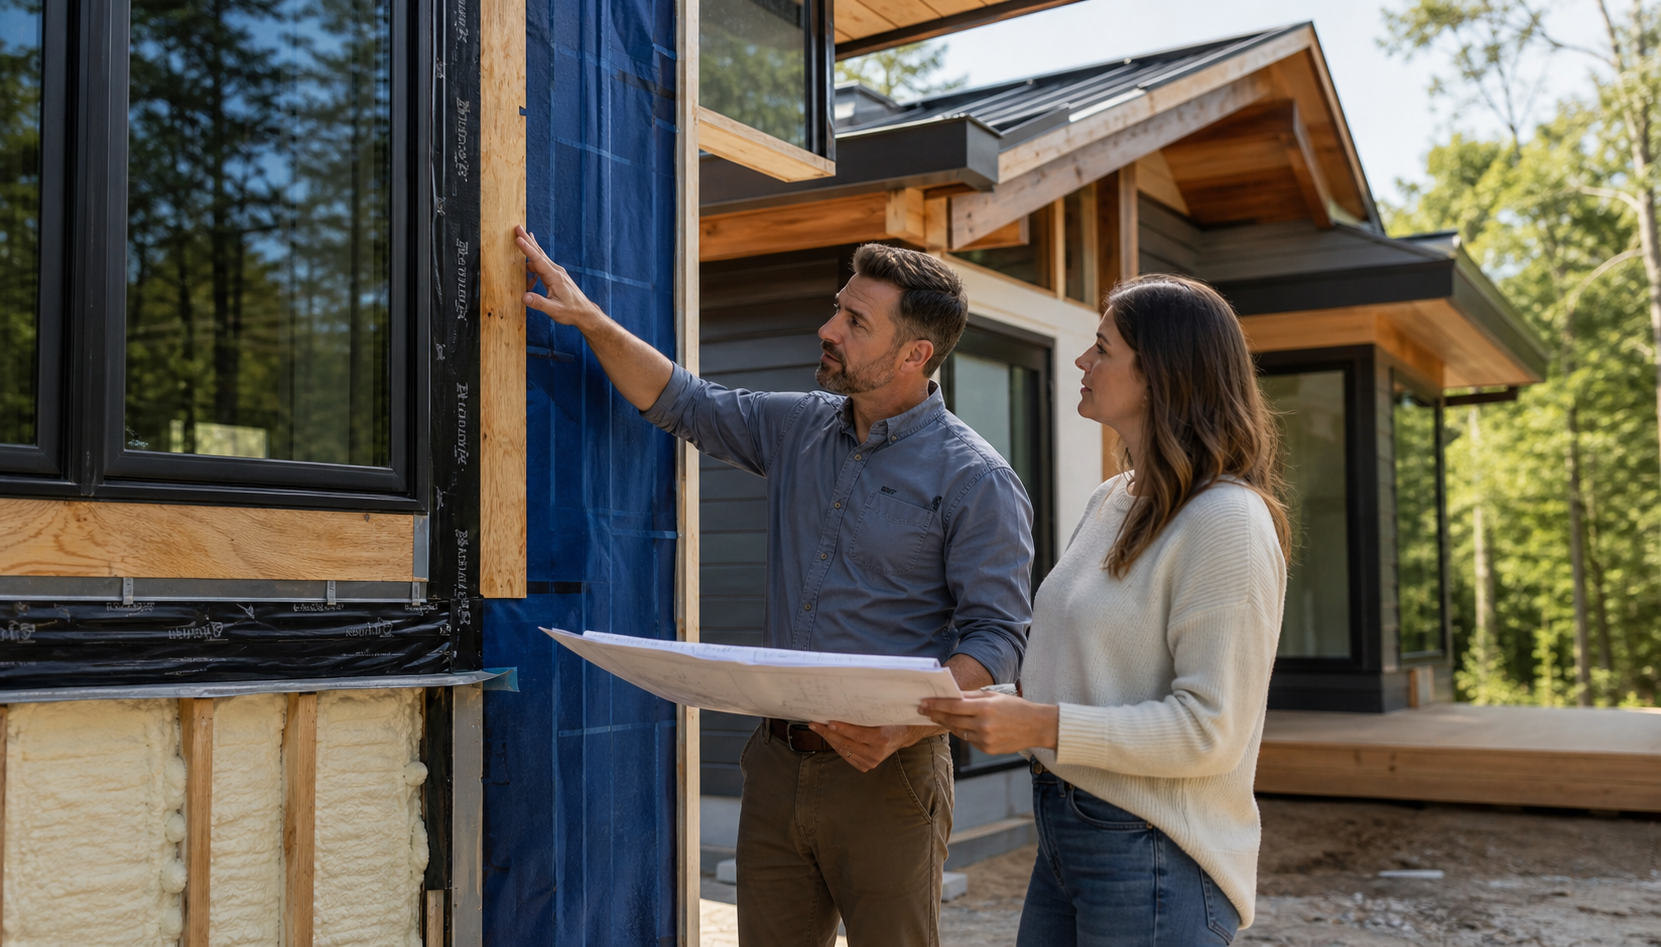
A high-performing home is not created by choosing insulation, windows, roofing, or siding one item at a time. Those components must work as a continuous building envelope—the roof, above-grade walls, openings, floors, foundation, and transitions that separate conditioned rooms from exterior or unconditioned space.
For a Carolina custom home or major renovation, envelope planning should answer four connected questions: Where will bulk water drain? Where is the air barrier? Where is the thermal boundary? How will each assembly dry if it becomes damp? The answers must remain continuous at windows, doors, roof edges, decks, porches, utility penetrations, attic and crawlspace transitions, and additions tied to an existing house.
Begin with the enclosure line
Mark the intended conditioned space on plans and sections before selecting assemblies. Trace one unbroken line around it. That line should make clear whether an attic or crawlspace is inside or outside the conditioned enclosure, where insulation changes direction, and how the air and water-control layers connect.
This exercise often exposes coordination questions early: a bonus room over a garage, a vaulted ceiling beside a vented attic, a porch roof connected to a wall, ducts crossing an unconditioned area, a fireplace chase, a tub or cabinet against an exterior wall, or an addition joined to older construction. These transitions deserve drawn details and assigned responsibility before framing or demolition makes decisions expensive.
Control liquid water first
The U.S. Environmental Protection Agency places control of liquid water at the beginning of moisture management. For a house, that means coordinating roof drainage, flashings, cladding, openings, foundation drainage, grading, plumbing, and construction-phase protection—not relying on interior finishes to hide a leak.
- Site and foundation: verify finished grades, runoff paths, roof discharge, foundation waterproofing or dampproofing, drainage materials, penetrations, and below-grade conditions for the actual site.
- Roof and wall transitions: detail valleys, eaves, rakes, sidewalls, headwalls, chimneys, roof penetrations, porch connections, and kick-out locations so water reaches the exterior drainage path.
- Windows and doors: coordinate rough openings, sill drainage, flashing sequence, water-control layers, fasteners, sealants, cladding clearances, and manufacturer requirements.
- Balconies, decks, and ledgers: resolve attachments and penetrations without interrupting drainage or trapping water against the wall.
- During construction: protect stored materials, dry wet assemblies, and document moisture-sensitive conditions before they are enclosed.
Read HHM’s related guide to roof, gutter, flashing, and drainage planning when the project includes existing leaks, roof replacement, or exterior-water concerns.
Keep the air barrier continuous
Insulation slows heat flow; it does not automatically stop air movement. The U.S. Department of Energy describes air sealing and insulation as complementary parts of an efficient enclosure. Air leaks can carry heat, moisture, pollutants, and outdoor air through gaps that are small or hidden.
The project team should identify the primary air-control layer for each roof, wall, floor, and foundation assembly, then show how those layers connect. Common trouble spots include top plates, rim joists, attic accesses, dropped ceilings, stairs against exterior walls, cantilevers, kneewalls, tubs and showers on exterior walls, recessed equipment, plumbing and wiring penetrations, garage separations, and transitions between new and existing construction.
Air sealing must be coordinated with mechanical ventilation and combustion safety. Tightening a house without evaluating ventilation, exhaust, pressure relationships, moisture loads, and fuel-burning equipment can create new risks. Whole-house testing and combustion-safety work belong with qualified professionals using procedures appropriate to the project.
Coordinate insulation with the complete assembly
Insulation performance depends on material, thickness, installation quality, framing, air movement, thermal bridging, moisture exposure, and continuity at edges. A nominal product rating alone does not establish how the whole roof, wall, or floor will perform.
Before work begins, the plans and specifications should identify:
- the applicable state and local energy-code path for the address and permit date;
- the thermal boundary and required values for each assembly;
- how cavities, exterior insulation, framing, and service spaces fit together;
- clearances and protection around heat-producing equipment and listed assemblies;
- how ducts, pipes, wiring, blocking, and structural connections affect continuity;
- the inspection and testing checkpoints before finishes conceal the work.
North Carolina and South Carolina do not use one interchangeable code answer. Confirm the current code edition, amendments, administrative procedures, and project-specific requirements with the authority having jurisdiction. Use HHM’s guide to verify building codes and permits for a Carolina home project rather than relying on a product page or an older project.
Plan drying as deliberately as water resistance
No assembly is guaranteed to remain perfectly dry for its entire service life. Materials can contain construction moisture, rain can enter during work, plumbing can leak, humid air can condense, and sealants or flashings can age. A responsible design therefore considers how an assembly can dry without trapping moisture between low-permeance layers.
The correct vapor-control approach depends on climate, indoor conditions, assembly type, materials, exposure, and code. Avoid universal rules such as placing the same vapor retarder on the same side of every wall. The design professional and responsible trades should evaluate the full assembly and selected products together.
Treat renovations as investigations
An existing wall or roof may differ from drawings or expectations. Before prescribing insulation or sealing work, document accessible conditions, prior additions, stains, odors, rot, corrosion, pest damage, bulk-water entry, ventilation, mechanical systems, and previous repairs. Selective openings or testing may be needed, with appropriate controls for suspected asbestos, lead-based paint, mold, electrical hazards, structural damage, or other unsafe conditions.
Do not cover active leakage or damp materials to keep a schedule moving. Identify the source, define the repair, verify drying, and record the condition before concealment. Major envelope work also needs coordination with electrical, plumbing, and HVAC planning so penetrations and equipment do not undermine the repaired enclosure.
Use a construction verification plan
Envelope quality depends on execution at many trade handoffs. A useful verification plan identifies the detail, responsible party, review point, acceptable evidence, and correction process. Photograph concealed transitions with location notes before they disappear.
- Preconstruction review: align plans, specifications, product instructions, submittals, code requirements, and trade scopes.
- Mockup: build and review a representative window, wall, roof, or foundation transition when project complexity warrants it.
- Pre-cover inspection: verify drainage, flashing, air-control, insulation, fire-safety, and penetration details while corrections remain practical.
- Testing: perform required or specified air-leakage, duct, water, moisture, or other tests through qualified parties using an agreed protocol.
- Closeout: retain approved documents, inspection results, test reports, product and warranty information, photographs, maintenance instructions, and open-item resolution.
Questions to ask before approving the envelope scope
- Can the team trace the water, air, and thermal layers continuously on the drawings?
- Who owns each transition between roofing, windows, cladding, framing, foundation, insulation, and mechanical work?
- Which existing conditions must be opened, measured, tested, or dried before design or installation?
- What code edition and local requirements apply to this address and permit date?
- Which product instructions and approved details control the work?
- What will be inspected or tested before concealment, and who documents corrections?
- How are ventilation, exhaust, humidity, and combustion safety coordinated with air sealing?
- What records will the owner receive at closeout?
Sources and verification record
- U.S. EPA — Moisture Control Guidance for Building Design, Construction and Maintenance, updated April 13, 2026; accessed August 24, 2026: liquid-water control, condensation management, construction moisture, maintenance, and verification framework.
- U.S. Department of Energy — Consumer Guide to Air Sealing the Home, accessed August 24, 2026: relationship among air sealing, insulation, ventilation, moisture, and combustion safety.
- North Carolina Office of State Fire Marshal — Codes: Current and Past, accessed August 24, 2026: official source for current and previous North Carolina code editions and amendments.
- South Carolina Building Codes Council — Building Code Adoption, accessed August 24, 2026: current South Carolina adoption status, modifications, implementation information, and local-administration context.
Review boundary: This guide explains planning and verification. It does not diagnose an existing building, design an assembly, approve a product or detail, determine compliance, or replace project-specific professional services, permits, inspections, manufacturer instructions, or safety procedures.