
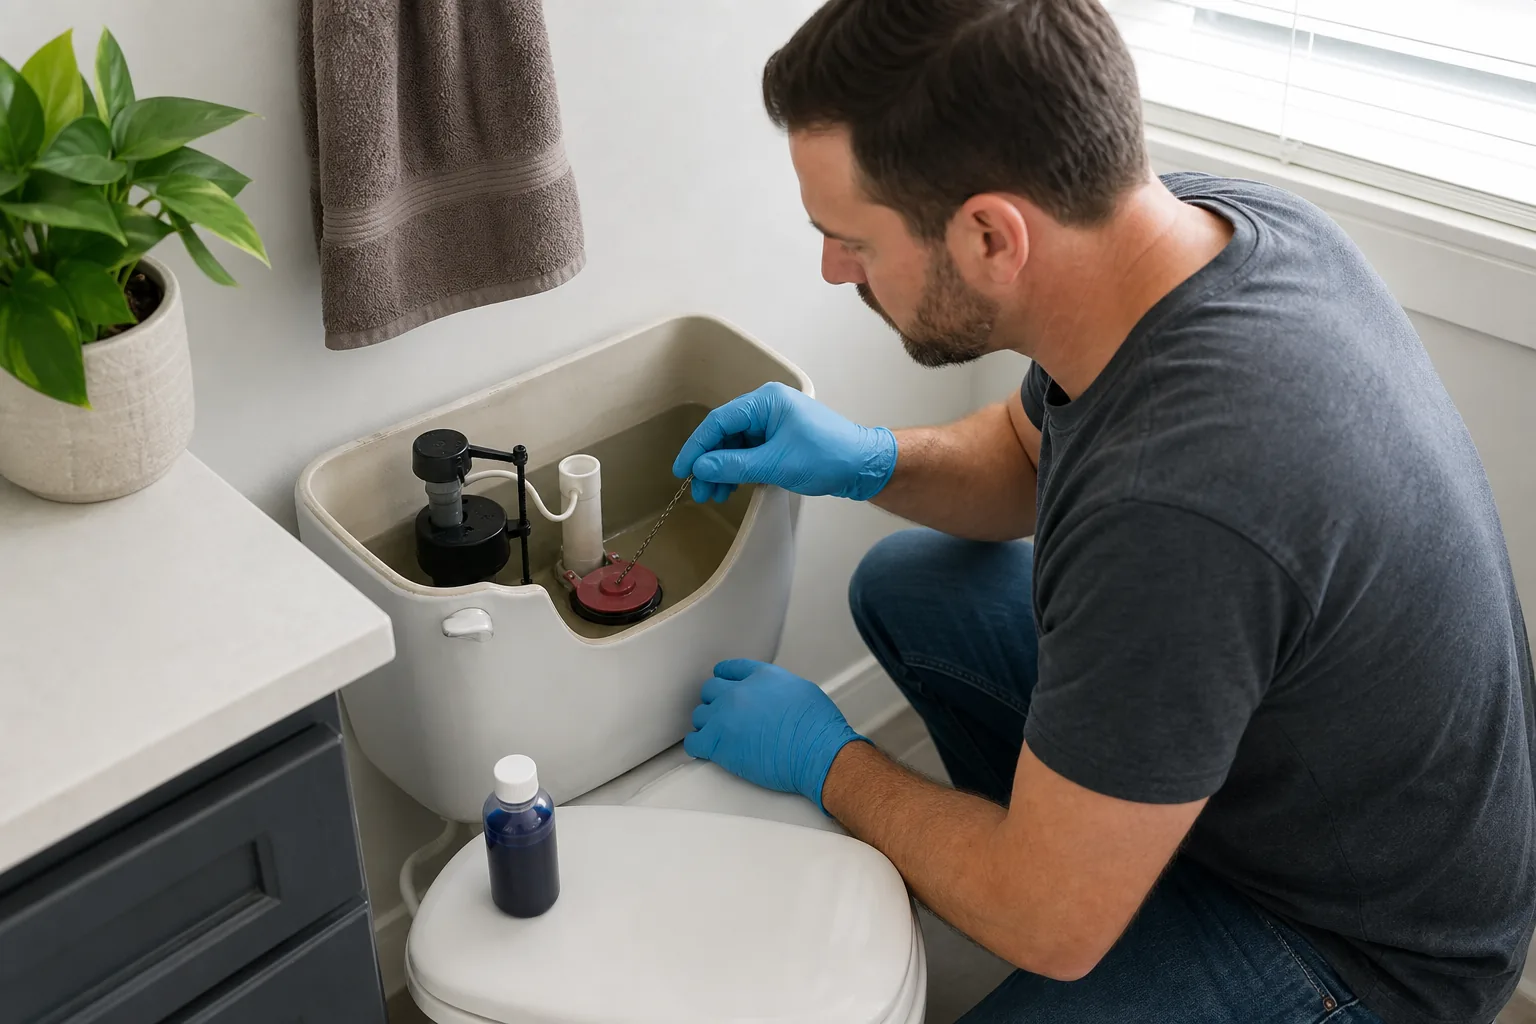
A toilet that refills by itself, runs continuously, or sends water into the overflow tube is wasting water and signaling that something inside the tank is not sealing or shutting off correctly. The safest first step is observation—not random adjustment.
Identify what “running” means
- Water continuously enters the overflow tube: the fill valve may not be closing, the float may be obstructed or misadjusted, or the water level may be wrong.
- The toilet refills periodically without being flushed: water may be leaking from the tank into the bowl through the flapper or flush-valve seal.
- The flapper stays partly open: the chain may be tangled, too short, caught under the flapper, or connected incorrectly.
- Water appears outside the toilet: stop treating this as a tank-adjustment problem and find the leak source before using the fixture.
Perform the EPA WaterSense dye test
EPA WaterSense recommends placing a few drops of food coloring or a dye tablet in the tank, waiting about 10 minutes without flushing, and checking the bowl. If color appears in the bowl, the flapper or flush-valve seal is leaking. Flush immediately after the test so the dye does not stain the fixture.
A failed dye test identifies a tank-to-bowl leak; it does not prove that every other component is correct. Mineral buildup, a damaged sealing surface, the wrong replacement part, or a worn seal can produce similar symptoms.
Inspect the flapper and chain
Turn the toilet’s accessible supply valve clockwise gently if it operates normally, flush to lower the tank water, and inspect the flapper or seal. Look for warping, cracks, mineral deposits, a chain caught underneath, or a chain with no useful slack. EPA notes that flappers wear out and advises checking them periodically; its current maintenance guidance recommends replacement at least every five years.
Replacement parts must match the toilet’s model and flush-valve size. Take a clear photo and record the model information inside the tank or on the manufacturer label. Do not assume that a “universal” part will produce the intended flush volume or seal.
Check the fill level without guessing
Restore the water and watch a complete refill cycle. The fill valve should stop and the tank water should settle at the manufacturer’s marked level. Water that continues into the overflow tube points to a fill-valve, float, adjustment, pressure, or compatibility issue. Follow the exact toilet and fill-valve manufacturer instructions; do not bend, cut, or improvise components unless those instructions specifically call for it.
Test the repair and the shutoff
After any compatible adjustment or part replacement, restore the supply slowly, flush several times, repeat the dye test, and dry-check the supply connection, tank, and floor. The toilet should fill, stop, and remain quiet without moisture outside the fixture.
If the shutoff will not operate, the fixture rocks, the tank hardware is corroded, the porcelain is cracked, the fill valve will not stop, or the leak returns, stop and call a qualified plumbing professional. A replacement toilet or work beyond accessible tank parts may involve property-specific installation and inspection requirements.
Need more than a flapper replacement?
HHM can help organize a recurring toilet problem, damaged flooring or vanity, fixture replacement, or a broader bathroom improvement into a documented project scope with the responsible trades.
Sources checked August 23, 2026
- U.S. EPA WaterSense: Home Maintenance — annual dye testing, flapper maintenance, overflow-tube symptoms, and professional-help boundary.
- U.S. EPA WaterSense: Fix a Leak Week — worn flappers, replacement-part matching, and leak-detection guidance.
- U.S. EPA WaterSense: Residential Toilets — fixture-efficiency context and common flapper leaks.
- North Carolina Office of State Fire Marshal: Codes — Current and Past and South Carolina Building Codes Council: Building Code Adoption — official references when the scope expands beyond simple maintenance.